Friday, December 9, 2011

And the winner is ...

First of all, I am realllllllllllly sorry for having delayed this for so long. More than being stuck at choosing the best entry, I was also getting worked up (and excited at the same time) about making this really special. Every answer I got was so unique, innocent, fresh & genuine that I wanted to do something nice with all those answers. It was really difficult even choosing the best one. After a lot of thought, I decided to make a movie out of all the answers..  

After experimenting for text effects on Windows Moviemaker and not being satisfied with what it offered in terms of text animation and effects, I finally decided to make the movie in Powerpoint as I had heard of softwares that convert Powerpoint presentations to videos. I searched for an apt audio track for a day. The movie was done pretty quickly but the next four days were spent in hunting for a good software that would do the conversion. Some softwares had huge watermarks on every slide, and some didn't record audio. The one which I finalised is fairly decent (though it does have the logo and a play/pause menu). Any suggestions for a better software?


Art means different things for different people, and that's what makes it so special. 

"Art is its own reward. Except if you rely on it for your bills" - Cynduja on slices of time


So, here's the movie.. I hope you like it and I am sorry about the logo & the menu bar messing it up! :(


Music: "Yellow" (Instrumental) - Coldplay

All the answers were so lovely.. I really think we should find time for ourselves more often to get in tune with our creative side. Each one of us has an artist in ourselves.. we just have to wake him up!

 "We are artists,writers,dancers,musicians. Everything else is just a way to pay bills" ~ Rehab

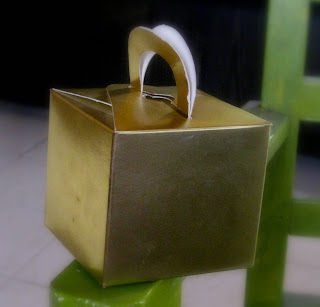
And now, announcing the winner of this contest... the proud owner of the box of rum chocolates is........ *drum rolls* .. AU for his poetic answer on what art means to him! :) Loved his way of expression.. sweet, different and appropriate! :)

Congratulations AU !!! Do let me know how you like them :)

@Everyone: Thank you so much for taking part.. you made it all so beautiful.. and have also encouraged me to organise more contests here!! :)

Thanks to Sanjita for spreading the word around :)

Much love,

...Anu

Monday, October 31, 2011

Diyas, Art and first contest!

If you've seen my earlier post, a lot of people asked me if the coconut shell burns when you light the diya. I had not given it a thought before making the diya as I thought I would cut the wick really short later to avoid it touching the rim of the shell. I am a risk taker in such matters anyway, which is risky for people living with me :P But my dad had confidently said it won't burn. My uncle confirmed it for me by saying it has something to do with the density of the coconut shell. I took pictures of it when it was lit. I lit the diyas for a good 4-5 hours each and I can assure you now that it won't burn the shell a bit.

I cut the wicks short later so that they don't touch the rim.


You can safely make use of the empty shells at your place :)

In other news, recently, someone asked me what art meant to me. I was surprised that I had never given it a thought before. It is something very abstract and personal. But after pondering over the question some more, I came to a conclusion that art, for me, is seeing a soul in a form. When you create, you are giving a form to your soul or heart or your inner self. When you create, you are one with the universe, you are in the moment or in the flow, and that is when your soul shows itself completely- in your eyes, on your face, in each one of your movements and in your art work/creation! :)

Also, each soul is unique.

It is also often said that the secret ingredient to most things is love. If you do something whole-heartedly, the end result is beautiful even if it is imperfect. Art is as abstract as your soul. It is never right/wrong or logical. It just *is*.

I know that each one will have a different answer to what art means to them. The answers also change over time, so I just thought of holding a small contest. I know it's too soon to host a contest on my blog but couldn't find a more appropriate time and reason to do so. 

I am not very good at cooking or making Diwali sweets, but I did try making a few rum,raisin & almond chocolates. My friends tasted some and they have safely made it through their lives :P Jokes apart, I am quite pleased with the way they have turned out so I thought I'd give away a box of 15 of these chocolates to the one with the best answer to the question "What does art mean to you?"! :) Of course, you cannot judge each one's interpretation of art but you can always judge the way of putting it across.


 So.. the rules are... there are no rules!! :D All you have to do is answer the question: "What does art mean to you?". You can post a comment here with your answer and email address. If your answer is lengthy and you'd like to express it in the form of a blog post instead of as a comment, you can do so. Just share the link to your post & provide your email address as a comment to this post. If you want to express it with an image or with your art work, that's okay too. Just provide the URL of your image/work along with your email address as a comment.

Entries will be accepted till the 15th of November and I will announce the winner on my blog besides contacting him/her separately. So do take part!!

I am so excited :D

Sunday, October 23, 2011

Coconut Diyas!

Being a manglorean, no food item cooked in our household is complete without coconuts. I don't particularly like them in every food item (I am bored of them), but I don't always have a say (else I'd have to start cooking :D). Anyway, with Diwali just round the corner, the sight of a heap of coconuts in my kitchen inspired me to do this:


A couple of small coconut shells, wax, some acrylic paint, bindis or other embellishments as decoration, and a stand made out of a roll of shiny lace was all it took.

Stand

You can make a diya out of bigger ones too:


Happy Diwali :)

Wednesday, June 1, 2011

Office Clip Bookmarks

I had seen some office clip bookmarks a long time back on an art blog, but never got around to making one.

Until today afternoon. I saw a purple office clip lying around on my computer desk, and I had recently purchased these stickers from a handicapped person in a local train.


I stuck two stickers of the same type on either side of the clip and I had made a bookmark in seconds! :D


That brought a storm of ideas to my mind and with some more stickers, waste card paper, bindis and mod podge, I came up with these :


This is how they look from the back:


The first one from the left has my initial on the back :)

And the third one from the left is sort-of a message: "U hold the key" meaning, you hold the key to all that goes around you. A dose of philosophy :P

This is how they look on the book:


This says a lot about a "bookmark" (a footprint always leaves a mark behind..) :


And this I made by sticking stickers onto one another:

 Front:


Back:


On the book! :

Will be making some more, in different ways hopefully.. will upload as and when I make them! :)

Friday, May 6, 2011

Gel Candles

Had posted this on my regular personal blog during Diwali. It is more apt on this one. So here you go.. some "gel candle" making made easy :)


All I needed is some assorted glasses, gel wax, wax dyes, wicks, aromatic oil, opaque acrylic all-surface paints and embeds (beads, magic balls etc.). I got all of this from a shop in Crawford Market, Bombay.


You need to coat the wicks with wax first so you heat a little wax just enough for the wicks. I didn't have a microwave then, so I used the double boiling technique.


Double boiling technique: I filled an aluminium vessel with some water and kept it on the burner, then placed a steel container inside it which had the wax. You have to make sure the water doesn't enter the steel container though i.e. the water shouldn't mix with the wax.


I wish I had taken pictures while I was making the candles so you could have had a better idea of all of this. :(


Keep stirring the wax till the bubbles reduce and till the wax melts. You can now put in the wicks at once but don't let them stay in for too long. The wax solidifies in seconds so you can take the wicks out in less than a minute to get fully coated wax wicks.


You can now proceed to making the candles. You will need to heat some more wax (as per the size and quantity of your containers). Gel wax is reusable so it's okay to overestimate. Once the wax melts, you can add a couple of drops of the dye you want and keep stirring. The quantity of dye you add depends on how dark or light you want the colour to be but to be safe, add a little of it first because the wax catches colour quickly.


You can now start pouring the wax in the container while keeping the wick inside. You can use a setup like this so that the wick stays in the center:


This image has been Googled for.


If you don't want the wick in the center, then you can just leave it leaning against the container. Don't pour the wax all at once. For scented candles, the aromatic oil has to be added just before adding the last layer of wax. This is so that the scent does not evaporate. So you can fill 3/4th of the container with wax, then add a couple of drops of the oil and pour in some more wax again.


Also, this is the part where you can get creative by adding embeds. I used magic balls and beads. You can add shells too- they give it a whole different look!


Magic balls are balls which grow in size when you soak them in water. I added some of these magic balls while pouring in the wax i.e. I added them in between layers of hot wax. Some I added after pouring all the wax, but I later noticed that these balls were shrinking back to their original size when exposed to air so it's better that if you're planning to use these, you put them in between layers of wax.


Beads can be added after pouring in all the wax just when the wax is still in the liquid form. They'll automatically stick to the hot wax. You can also add beads in between layers of wax- it's all upto you.


Lastly, you can paint these glasses/containers using acrylic all-surface paints or stick some stickers on them to make them look attractive. I used paints, star and heart shaped stickers, satin ribbons etc.


And this is how it all looked like in the end:


You can notice the size of the magic balls in the first container here. Some of these balls are slowly shrinking to their original size due to exposure to air. So it's advisable to add them in between the wax if you're planning to use them, to retain their enlarged size. The white and some coloured beads have been added at the end when the wax was still hot.


Cheers!


You don't feel like lighting these after making them though because you don't want them to melt after you've decorated them so well :D It's fun nevertheless!

Sunday, March 27, 2011

Bookmark

A few days back, I gifted a couple of books to a friend. These books were ordered from Flipkart. They've started providing bookmarks with every one of their books now and they're pretty interesting too. The bookmarks have a word on each side; these words are homophones, meaning they sound the same but are spelled differently. I liked how they've come up with this.. and it gave me an idea to make a bookmark myself. It'd give me something interesting to do plus it'd add a personal touch to the gifts- something I always love doing. So I removed a bookmark from one of those books, kept it for myself (:P) and began making a new one.

Materials used :
Cardboard,
White card paper,
Blue satin ribbon,
Purple card paper,
Silver sparkle pen,
Black marker,
Flower embellishment,
Bindis,
Glue,
A flat paintbrush,
Mod Podge (Glossy).

First, I took a plain cardboard and wrapped it with white paper with some glue to make it stay. I didn't have to cut the cardboard to the size of my bookmark- I just found one luckily that matched the size. After drawing a border on both sides with my silver sparkle pen, I got some embellishments from the nearby stationery shop. He is so fond of his stuff- one person who genuinely doesn't mind whether people buy his stuff but he wants everyone to have a look at it. I like going there just for his enthu. Anyway, so this blue flower really stood out from the rest of his embellishments and I decided to use it right away.


After sticking it onto the cardboard, I thought of writing something on the card. There was a quote I read on "Reading" some time back- Books let us into their souls and lay open to us the secrets of our own.  ~William Hazlitt


Googled for Old English fonts and wrote the quote on it with my black marker. For quotes, calligraphy pens always work better than any other pens or markers. I couldn't find my calligraphy pen though, so had to settle for the marker.


I turned it over and started working on the back side. I cut three small purple flowers out of purple card paper, and stuck it onto the bookmark. Next, I made a small bar code with the black marker at the bottom right, and wrote my name and price.

My brother had got me three bottles of mod podge long back: glossy, matte and shimmer. As the description on the bottle says, it is a glue, a finish and a sealer! A dear friend, Sakhi introduced me to it and I have fallen in love with it :) I used the glossy one as "finish", meaning, I painted all over the bookmark- on both sides that is, with a flat paintbrush. My brother got these bottles from Michaels. In India, you may try looking for it in Hobby Ideas or any other well known craft shop.


I left it to dry for a few minutes, and stuck a blue satin bow on the front. Next, I stuck three silver bindis onto the three flowers at the back. And my bookmark was ready!


handmade by anu
mrp : priceless


Do feel free to comment and share more such bookmark ideas with me! :)